In a nutshell
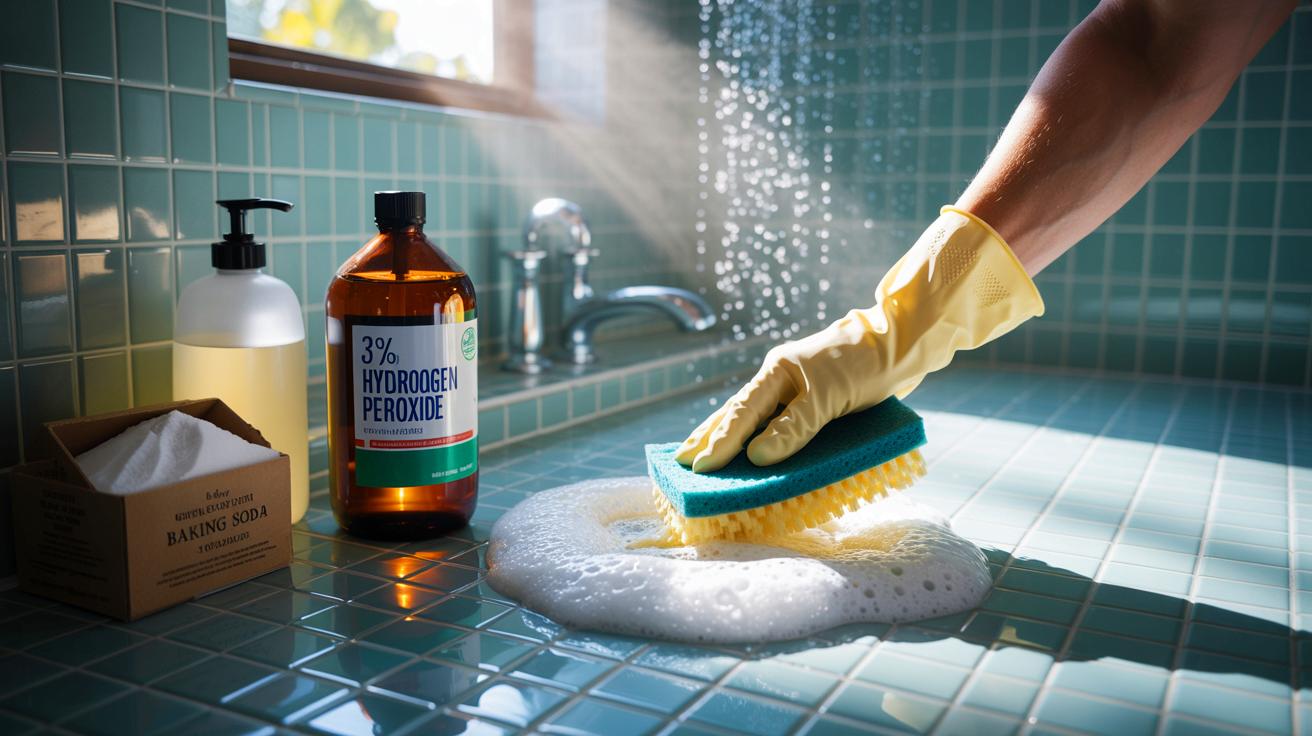
- 🧼 Swap harsh chemicals for a safe, effective trio: baking soda + 3% hydrogen peroxide + dish soap that tackles soap scum, stains, and grime without the fumes of bleach or vinegar.
- 🧪 Clear ratios and formats: a thick paste for grout and tub rings, a spray blend for walls and glass, and a standard mix for wipe-downs—made fresh and stored in an opaque bottle.
- 🧽 Step-by-step method: pre-wet surfaces, apply the mix, allow dwell time (5–15 minutes), scrub lightly, then rinse and squeegee for streak-free glass and glossy fixtures.
- ⚠️ Surface safety: do not use on marble, limestone, or travertine; spot-test matte black or specialty finishes, and never mix peroxide with bleach; keep batches small and out of sunlight.
- ✨ Real-world payoff: brighter grout, cleaner tubs, and crystal-clear doors—at low cost, with minimal odor—ideal for weekly maintenance that makes the bathroom look like new.
Skip the harsh fumes. Skip the eye-watering sting. Homeowners are rediscovering a bathroom-cleaning staple that’s powerful, wallet-friendly, and safe on most finishes—without reaching for vinegar or bleach. The mix is simple and science-backed: a gentle abrasive to lift grime, a mild oxidizer to tackle stains and mildew shadows, and a surfactant to cut the slick film of soap scum. It works quickly. It rinses clean. And it leaves the room smelling like… nothing. That’s the point. No vinegar, no bleach—just a smart trio that makes tile, tubs, and fixtures look new again. Here’s how to make it, where it shines, and the smart precautions that guarantee glossy results every time.
The Simple Mix: What It Is and Why It Works
The core recipe uses three pantry-level heroes: baking soda for gentle abrasion, 3% hydrogen peroxide for stain-lifting oxidation, and a squirt of mild dish soap to break down oily residue. Each plays a precise role. Baking soda dislodges film without scratching glass or porcelain when used with a soft sponge. Peroxide, at household strength, brightens grout lines and neutralizes lingering mildew discoloration. Dish soap slices through sunscreen, conditioner buildup, and soap scum, letting the other ingredients reach the problem.
Unlike vinegar or bleach, this blend has no heavy fumes and won’t corrode chrome or pit stainless fixtures with routine use. It’s tough on grime, kind to finishes. Think of it as a targeted clean: abrasion, oxidation, and surfactant action working in concert. On ceramic tile, acrylic tubs, fiberglass surrounds, and vitreous china, the results are immediate. Caution still matters. Avoid extended dwell on natural stone such as marble or limestone, and always spot-test matte black fixtures or specialty coatings. When in doubt, shorten contact time, then rinse and buff.
How to Make It: Ratios, Tools, and Variations
Start with a small batch. In a non-reactive bowl, combine 1 cup warm water, 2 tablespoons baking soda, 2 tablespoons 3% hydrogen peroxide, and 1 teaspoon mild dish soap. Stir gently; it will foam slightly. For grout or stubborn rings, skip the water and make a thicker paste: 3 tablespoons baking soda, 2 tablespoons peroxide, 1 teaspoon dish soap. For a sprayable cleaner, use 1 cup warm water, 1 tablespoon baking soda (dissolved well), 2 tablespoons peroxide, and 1 teaspoon dish soap in an opaque spray bottle. Use within the day.
| Mix Type | Ratio (approx.) | Best For | Notes |
|---|---|---|---|
| Thick Paste | 3 tbsp soda + 2 tbsp peroxide + 1 tsp soap | Grout, soap scum, tub rings | Apply, dwell 10–15 minutes, scrub lightly |
| Spray Blend | 1 cup water + 1 tbsp soda + 2 tbsp peroxide + 1 tsp soap | Walls, glass, fixtures | Wipe quickly, then rinse and squeegee |
| Standard Bowl | 1 cup water + 2 tbsp soda + 2 tbsp peroxide + 1 tsp soap | General wipe-down | Use with sponge or microfiber cloth |
Tools matter. Choose a non-scratch sponge, a soft-bristle scrub brush, and a dedicated grout toothbrush. Keep a microfiber towel for final buffing—glass and chrome will gleam. Never mix this or any peroxide solution with chlorine bleach. Label your bottle, make fresh batches, and store out of sunlight. You’ll see better foam and faster action when the peroxide is fresh.
Step-By-Step Application for a Sparkling Bathroom
Prep first. Run warm water over the surfaces to loosen film and pre-wet grout. Shake or stir your cleaner. For tubs and showers, coat the walls from the bottom up to avoid drip marks. Apply paste to grout lines and tub rings with a toothbrush; use the spray or standard blend elsewhere. Let it dwell 5–10 minutes on routine messes, 15 minutes for heavy buildup. That contact time is the secret. It lets the oxidizer and surfactant penetrate the scum.
Now scrub with purpose, not force. Short, overlapping strokes. A circular motion on tile faces, linear strokes along grout. Rinse thoroughly with warm water until the surface squeaks under your fingers. For glass, drag a squeegee top to bottom, then buff the edges with microfiber. On fixtures, a final wipe with a slightly damp cloth removes any remaining film. If haze persists on glass, a second quick pass with the spray blend and immediate squeegee leaves a crisp, streak-free finish. Dry everything. Water spots are preventable; the towel is your insurance.
Troubleshooting and Surface Safety
Stubborn grout shadows? Reapply paste, extend dwell to 20 minutes, and scrub with a firmer nylon brush. For caulk edges, use a cotton swab to target the bead, rinse gently, then pat dry to prevent wicking under the seal. On acrylic tubs and fiberglass surrounds, keep pressure light to avoid micro-scratches—let chemistry, not elbow grease, do the work. Glass shower doors love this mix, but rinse generously and squeegee instantly to beat mineral spotting in hard-water regions.
Protect sensitive materials. Do not use on marble, limestone, or travertine; even a mild alkaline-oxidizing combo can dull honed finishes or lighten porous stone. For those, a stone-safe pH-neutral cleaner is the move. Matte black or specialty-coated fixtures? Spot-test on the underside of the spout for one minute, rinse, then proceed. And because hydrogen peroxide breaks down with time and light, make only what you’ll use in one cleaning session. If your batch stops gently fizzing, it’s lost potency—mix a fresh one for best results.
This deceptively simple blend—baking soda, 3% hydrogen peroxide, and mild dish soap—brings a bathroom back fast, without the sting of bleach or the tang of vinegar. It’s cheap. It’s quiet. It works. With smart ratios, short dwell times, and a rinse-and-buff routine, you can keep tile bright, fixtures glossy, and glass streak-free. The real win is confidence: a safe, dependable method you can reach for every week. What surfaces in your bathroom are you most eager to revive with a bleach- and vinegar-free clean?
Did you like it?4.5/5 (22)
Tried the thick paste on my shower grout tonight and the lines brightened up fast. Love that there’s no headachey fumes and the bathroom just smells like… nothing. This is going into my weekly clean routine—thanks!
Quick question: for matte black taps, your spot-test says one minute then rinse. If no dulling, is a 5–10 minute dwell still safe, or should I keep contact super short and repeat passes instead?
My grout is older than my playlist, so I appreciate the “chemistry, not elbow grease” mantra. Any brush firmness recs for ancient groutt without scratching the surrounding tile? Nylon medium? Soft? I’d rather not sand my shower.
About storage: if I make the spray blend in an opague bottle in the morning, will it carry through an afternoon bathroom blitz, or does peroxide drop off that quickly? Trying not to waste ingredients while batching chores.
This is so clear and doable—pre-wet, dwell, scrub, rinse, squeegee. Bless you for the ratios and the reminder to label the bottle. Defintely adding a microfiber towel to my caddy next shop.
Report back: tub ring from sunscreen and hard-water soap scum—gone after a 12-minute dwell and light scrub. The squeegee finish on the glass was clutch, zero streaks. My chrome looks like a tiny mirror now!
For the spray version, any tips to keep the nozzle from clogging if the baking soda doesn’t dissolve perfectly? Warm water helps, but mine still gets a bit gritty and splutters. Maybe pre-dissolve soda in a little hot water?
Hard-water household here. I did the rinse, then immediate squeegee, then microfiber edges, exactly as written—no spots the next morning. That last towel step really is insurance; I’d skipped it before and paid in chalky dots.
Could you add metric amounts next time? Cups and tablespoons work, but I’d love milliliters and grams for consistency. Also curious if a pH-neutral dish soap matters, or will any mild formula behave the same?
Thank you for the clear stone warning. Our vanity is honed marble, so I’ll keep this to tile, tub, and porcelain and stick with pH-neutral on the counter. Saved me from a costly oops, seriously appreciate it.
Just cleaned the shower walls bottom-up like you said—no drip marks, shiny as new. Rinsed, squeegeed, buffed, done. Five stars and zero stingy smells. My bathroom finally smells like… nothing! 🙂